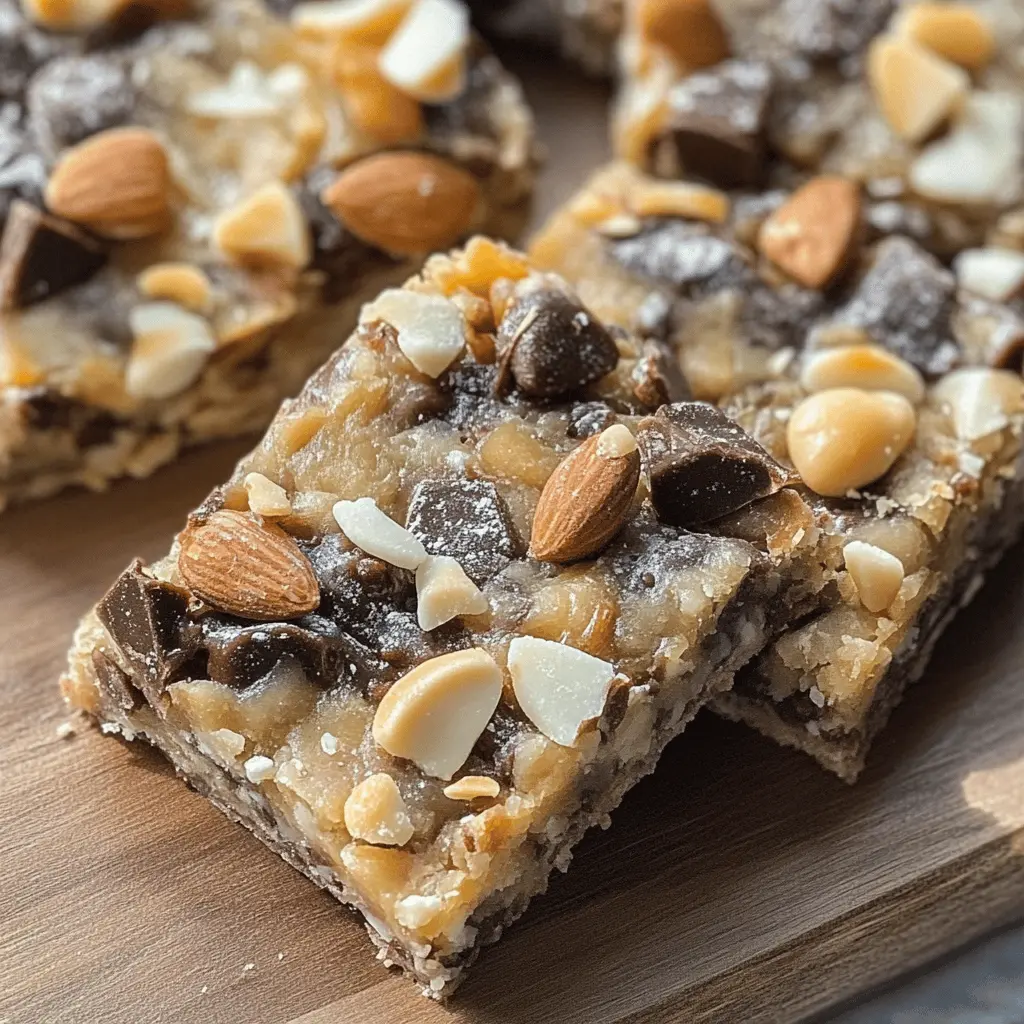
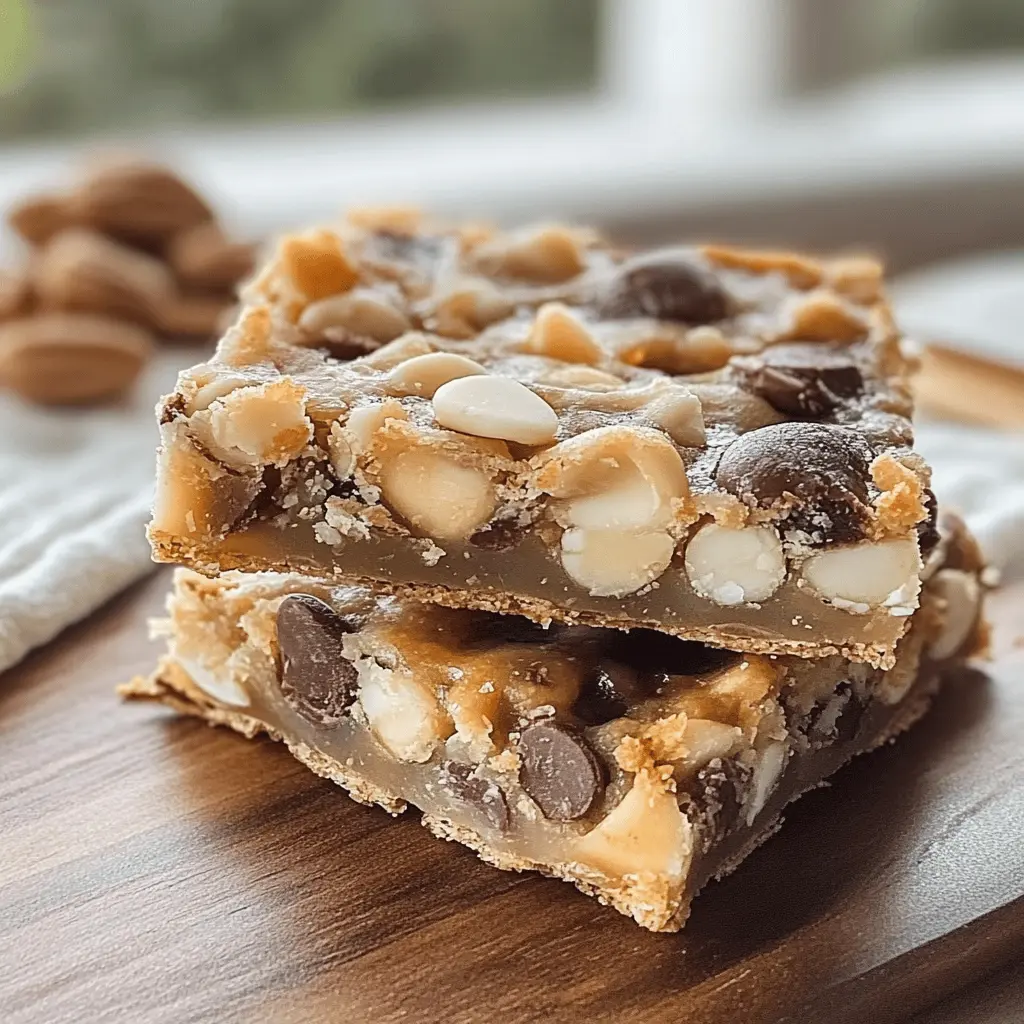
Keto Magic Bars are a sweet treat that’s full of flavor and totally guilt-free! Made with nuts, coconut, and a low-carb chocolate layer, these bars are perfect for satisfying your cravings.
They are so easy to make, and I love that I can munch on them without worrying about my diet. Plus, they’re great for sharing (if you want to!). Who could resist a tasty magic bar? 😋
Key Ingredients & Substitutions
Almond Flour: This is key for keeping the bars low-carb. If you need a nut-free option, consider using sunflower seed flour instead. I’ve found almond flour gives a nice texture, but some people enjoy the taste of coconut flour as a substitute, just use less as it absorbs more moisture.
Unsweetened Shredded Coconut: Coconut adds a nice chew. If you’re not a fan of coconut, feel free to skip it or use more nuts instead. You could also try finely chopped oats for a different texture, although it may no longer strictly be keto.
Sugar-Free Chocolate Chips and Butterscotch Chips: These will make your bars taste sweet without the carbs. Brands differ, so test a few to find your favorite. Alternatively, you could chop up a keto-friendly chocolate bar if chips are hard to find.
Keto-Friendly Condensed Milk: This is crucial for binding and sweetness. You can buy keto condensed milk, or make your own by simmering heavy cream with a sweetener until it thickens, which is a fun twist and very rewarding!
How Do I Create a Perfect Crust for My Bars?
The crust is the foundation for your magic bars, and getting it right is essential! Start by combining the almond flour, shredded coconut, erythritol, melted butter, salt, and vanilla until you see a crumbly dough. Make sure to press it down firmly in the pan.
- Use a flat object like the bottom of a measuring cup to evenly compact the dough.
- It should look smooth and even before you add the toppings.
- Don’t skip greasing the pan or lining it, as it will help the bars release easily after baking.
How to Make Keto Magic Bars
Ingredients You’ll Need:
For the Base:
- 1 1/2 cups almond flour
- 1/3 cup unsweetened shredded coconut
- 1/4 cup granulated erythritol (or your preferred keto sweetener)
- 1/4 cup unsalted butter, melted
- 1/4 teaspoon salt
- 1/2 teaspoon vanilla extract
For the Toppings:
- 1/2 cup sugar-free chocolate chips
- 1/2 cup sugar-free butterscotch chips
- 1/2 cup chopped nuts (such as pecans or walnuts)
- 1/2 cup unsweetened condensed milk (keto-friendly version)
How Much Time Will You Need?
This delightful recipe takes about 10 minutes to prep and 25-30 minutes to bake. After that, allow some time for the bars to cool completely. So, you can enjoy delicious Keto Magic Bars in around 40-50 minutes, plus cooling time.
Step-by-Step Instructions:
1. Preheat Your Oven:
Start by preheating your oven to 350°F (175°C). This ensures that your bars bake evenly. If you have a baking pan, either grease an 8×8-inch pan or line it with parchment paper for easy removal.
2. Mix the Base Ingredients:
In a mixing bowl, mix together the almond flour, shredded coconut, erythritol, melted butter, salt, and vanilla extract. Stir everything with a spoon or spatula until it’s well combined and looks crumbly. This will form the base of your magic bars.
3. Form the Base Layer:
Now, take the crumbly mixture and press it firmly into the bottom of your prepared baking pan. Make sure it’s spread evenly across the pan so that every bite of your bars has a nice, consistent base.
4. Add the Toppings:
Sprinkle the sugar-free chocolate chips, sugar-free butterscotch chips, and chopped nuts generously on top of the base layer. It’s like layering a delicious treat atop a solid foundation!
5. Drizzle the Condensed Milk:
Take your keto-friendly condensed milk and gently drizzle it over the toppings. Make sure it’s distributed as evenly as possible so that every bite has that sweet, creamy goodness.
6. Bake the Bars:
Place the pan in your preheated oven and bake for 25-30 minutes. Keep an eye out for the edges turning golden brown and the center setting up nicely. The aroma will be delicious!
7. Cool and Cut:
Once baked, remove your magic bars from the oven and let them cool completely in the pan. This step is important, as it helps the bars firm up. Once cooled, you can cut them into squares or bars, whichever you prefer.
8. Store and Enjoy:
Store your Keto Magic Bars in an airtight container in the refrigerator. They’ll stay fresh for up to a week, but we doubt they’ll last that long—they’re too good!
Enjoy your delicious Keto Magic Bars as a guilt-free treat!
Can I Substitute Almond Flour with Another Flour?
Yes, you can use coconut flour instead, but you’ll need to adjust the amount. Use about 1/3 cup of coconut flour since it’s more absorbent than almond flour. You may also need to increase the liquid slightly or add an extra egg to help with texture.
What Can I Use Instead of Erythritol?
You can use other keto-friendly sweeteners like monk fruit sweetener or stevia. If using stevia, be sure to check the conversion ratio, as it’s much sweeter than erythritol. Generally, you’ll want to use about half the amount of stevia compared to erythritol.
How to Prevent Bars from Sticking to the Pan?
Ensure you either grease the pan well with cooking spray or line it with parchment paper, leaving some overhang. This will help you lift the bars out easily once they’re cooled. If using parchment, be sure to grease it lightly too!
Can I Store These Bars at Room Temperature?
For best freshness, it’s recommended to store them in the refrigerator. However, they can be kept at room temperature for a couple of days if your kitchen is cool. Just make sure they are in an airtight container to maintain their texture!